There are seasons to life and I am apparently in one of “forced creativity.†I say that tongue in cheek, no one is holding a gun to my head and making me be creative. It’s more that situations are arising that are requiring or allowing me to express creativity. So the next several posts I’m going to do are on what I have been up to the past months and what is still going on.
Here’s the situational run down, all of my projects have been due or will be due to one of the following:
– We bought a condo, and after years of apartment living I could finally decorate with permanency (and paint!) so I have been coming up with ideas for doing that.
– Also, having the space in the new place allowed me to work on some project ideas I have had on the back burner for a while.
– Then you have the sudden baby boom that our church is experiencing. I am not exaggerating when I say Matt and I know no less than 10 couples that have either had a baby in past 3 months OR are expecting a baby this summer. This means lots of upcoming showers.
– Matt and I are both in the bridal party of our friends’ wedding in June. So that means I’m involved in helping with the wedding, planning the shower and bachelorette party. Also, Matt’s sister is getting married too, so there is another set of prewedding events!
– I’m an auntie! A proud one at that, so when I either get an idea or see one to shamefully steal from someone else. I’m going to!
– I discovered pinterest which will simultaneously make you realize how very not creative you are AND make you think that you can totally refinish that table using just coffee and vinegar then sew matching stylish curtains out of leftover grocery bags in 6 easy steps.
So, we have to clear out a bit of a backlog from projects I did earlier this year. Starting with my honorary nephew’s first birthday!
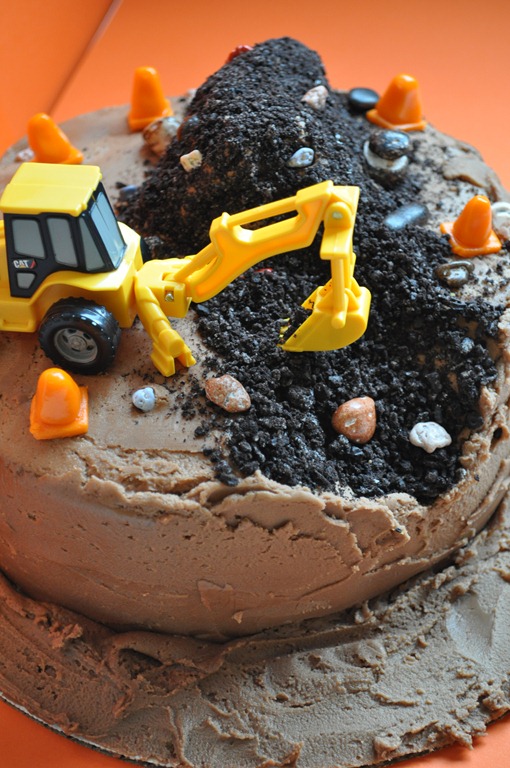
Crystal emailed me a picture several months ago of a cake, she said something to the effect of “I would love to do something like this for Elijah’s birthday.†And because she is my friend and I love baking, I responded with “I bet I can do that if you want me to try!â€
This was the picture she sent me:

After some searching, I found the original blog that posted it. It seemed simple enough so I thought I would try it.
Now, if this really was a crafting blog I would have taken step by step pictures of how I did it. But this isn’t and I didn’t. So I’ll just tell you… you can skip this part if you like, just scroll down to the picture…
The cake itself was just yellow cake (box mix ::gasp!::) with some dye added (you’ll see later), and homemade chocolate butter-cream frosting (which I ate more of that day than I care to admit). The dirt is crush chocolate cookie.
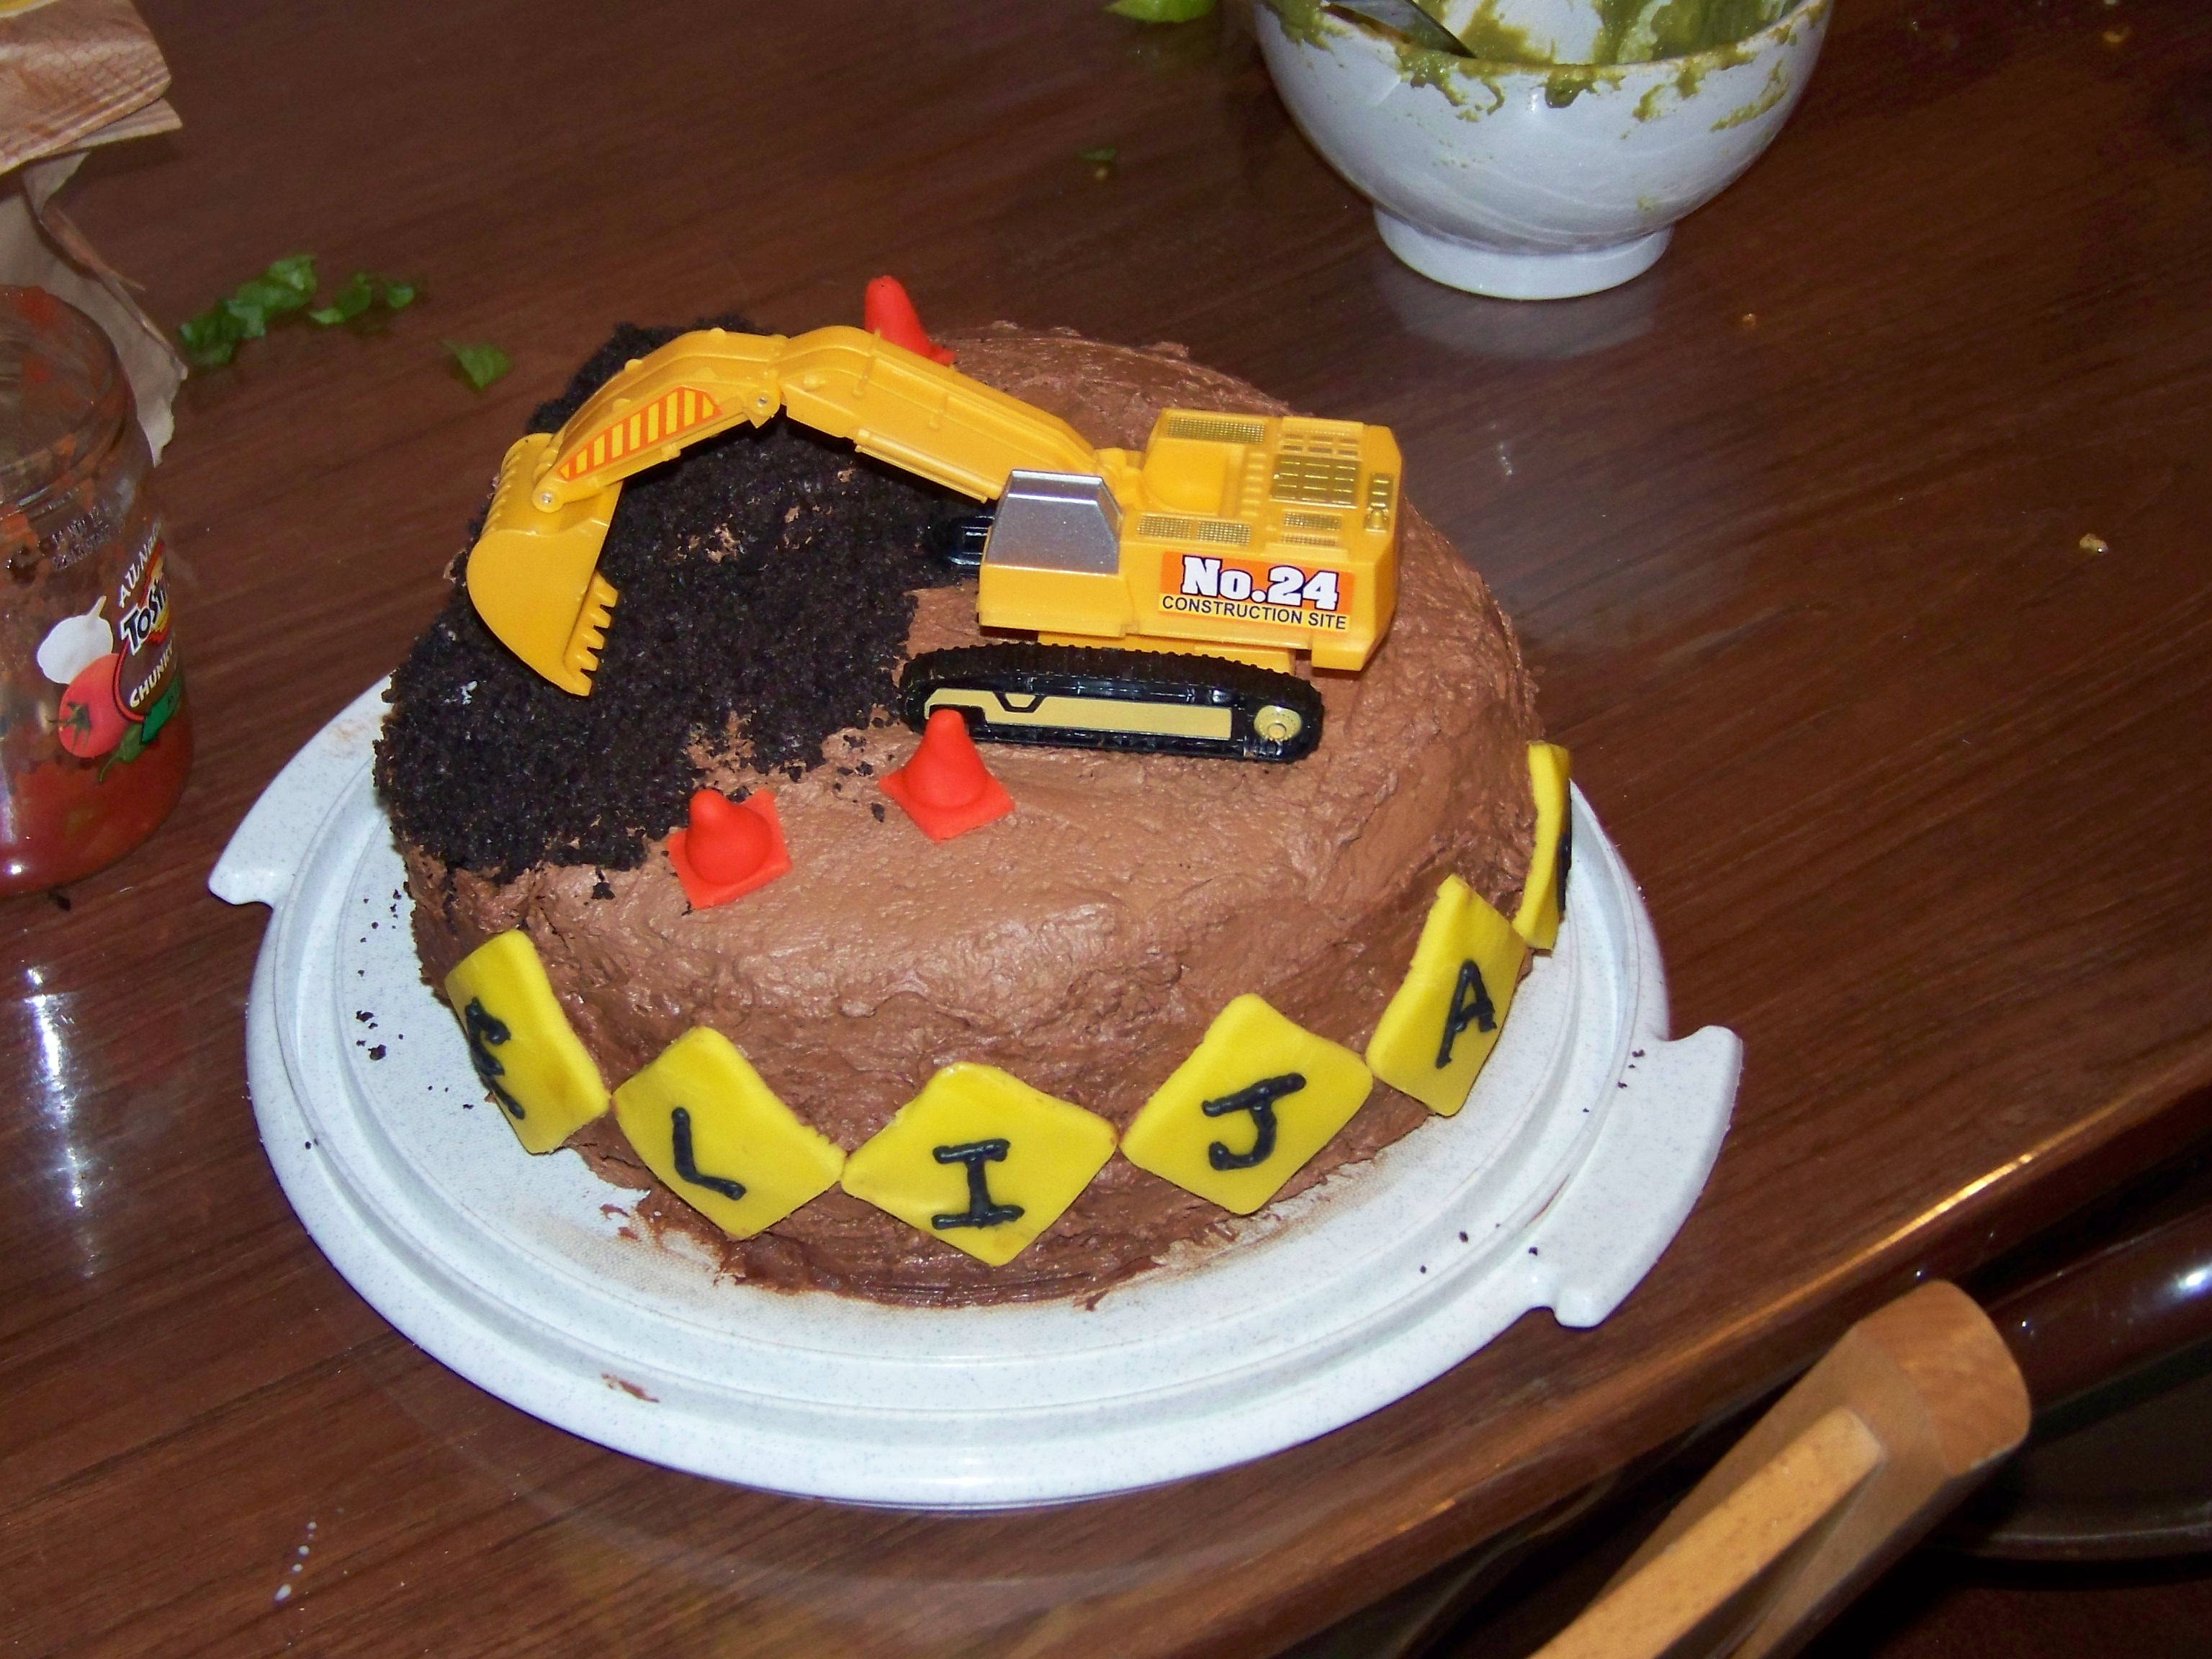
I have not worked with fondant before, so I wasn’t about to buy a ton of it and dye it, but I also wasn’t about to invest in a giant thing of pre-colored orange fondant either. Thankfully, Wilson makes this kit with orange, yellow, pink, and purple fondant. Options to do something else at some point but small and cheap enough that if I wasted it, it wasn’t a big deal. Perfect! Also, I didn’t want to invest in fondant tools for what could be a one-time thing either, especially with a small kitchen! So I used what I had. I rolled it out with a rolling pin covered in plastic wrap to prevent sticking. The cones were my favorite thing over all, SO CUTE! I used a lego block to etch the lines for the square bottom to the cones, then just cut those with a butter knife. I shaped the cone part by hand.
After I put those on with the toy (found on Amazon) and the dirt pile, I felt it was missing something. I came up with the traffic signs spelling his name. The fondant I brought came with yellow, remember? How to cut them out? I have a set of salt and pepper shakers from the 99 cent store from when Matt and I first were married. It was the perfect shape! I just used the lid to cut out the shapes. I had some black dye leftover so I colored some store-bought white icing I had and used that to pipe his name on to the signs.
And here is my finished cake!

Not too shabby if I do say myself!!
Now for the surprise!
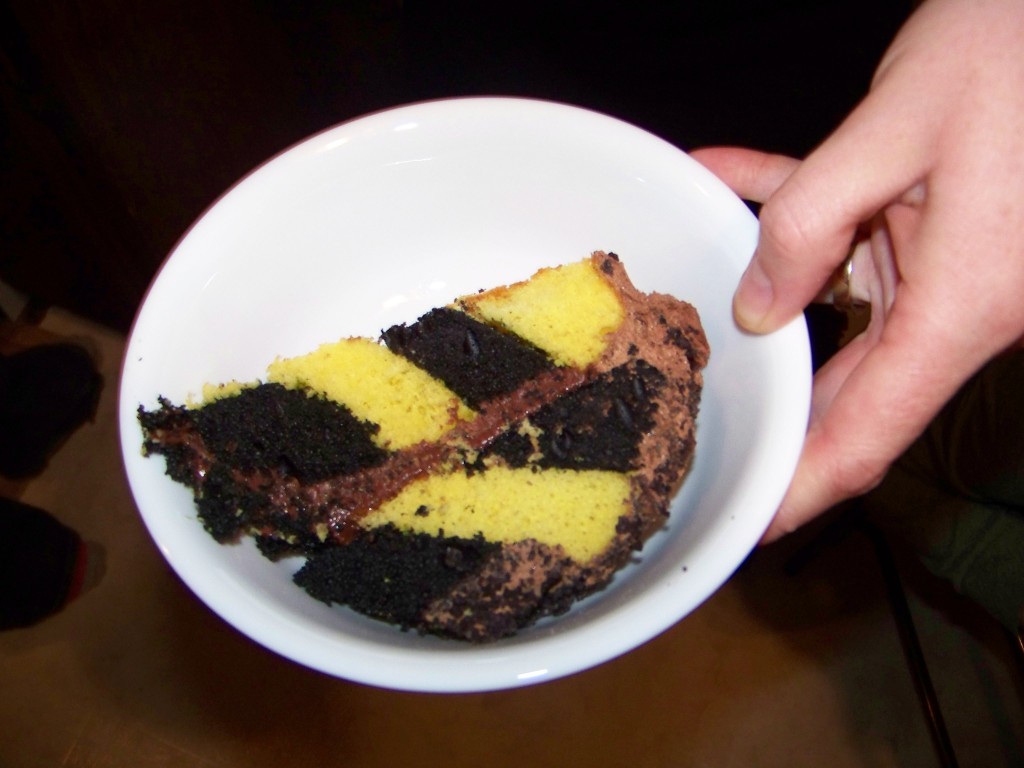
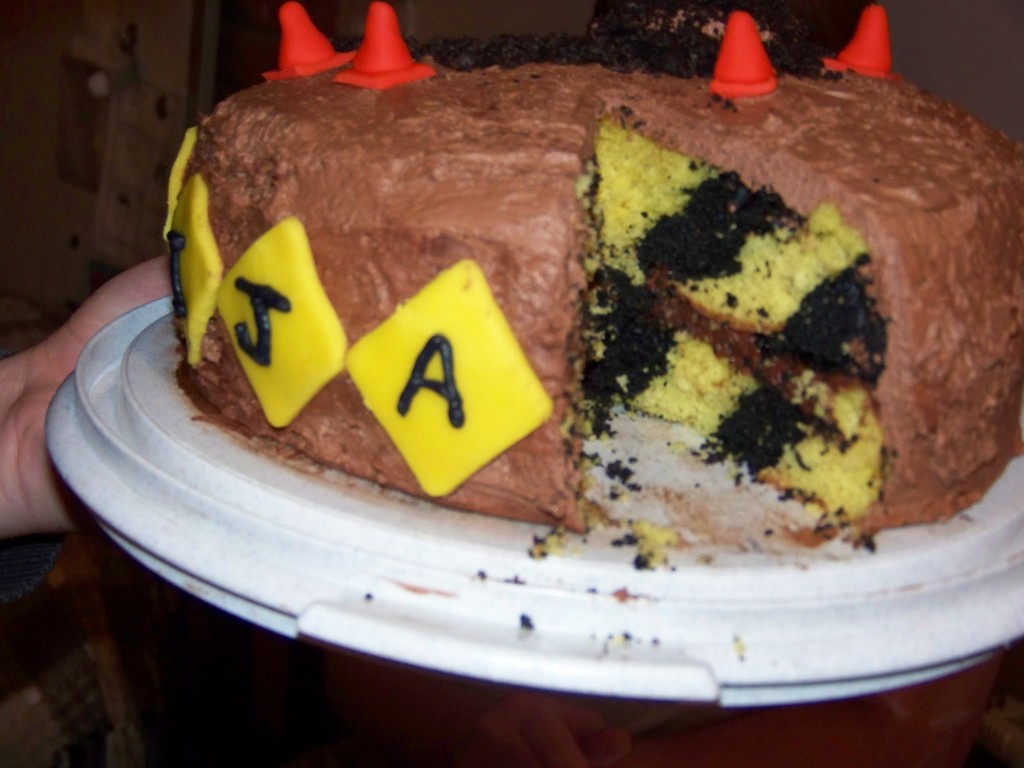
Everyone thought the cake was adorable as it was, but there was one more thing I was very anxious about. You see, I found something out in that original blog post, an added feature you couldn’t see in the photo. And by the very nature of what it was, I would have no idea if it worked until everyone else did. Thankfully, when Crystal cut into the cake, this is what everyone saw!
Caution tape!
It worked perfectly!!! Now this does make it hard to serve as it loses it integrity, but it looked so fun!

You can read the tutorial here on how to do it, it actually is quite easy. I made one mistake early on though, because I was making caution tape, I thought yellow and chocolate cake would be best. It doesn’t work because cakes do not all bake the same way as far as moisture and texture. The chocolate was denser and stickier than the yellow cake and caused it to fall apart. You have to use the same mix for both cake layers and just dye them which is what I ended up doing. Also, don’t panic if your circle breaks in the process, frosting fixes quite a bit and no one will know once it is cut!
So there was my first big project! Adorable and quite tasty!

4 Responses
Stay in touch with the conversation, subscribe to the RSS feed for comments on this post.
Very cool!
I bet you can add cocoa instead of dye to the dark bits and still have chocolate cake without changing the properties too much?
Yeah the cake is cool and all and you should be proud, but what I was really thinking is that those 10 couples you know that are expanding their families probably feel very “alone” and all and somebody should step up and join them in their joy. I mean really, 10 isn’t REALLY enough. There should be at least eleven couples. I have a suggestion who I’d like it to be.
I love it!!!
Continuing the Discussion